��meteor���ٌ��F��ƽ�_����
�r�g��2018-09-26 ��Դ��δ֪
��meteor���ٌ��F��ƽ�_����
�r�g��2018-09-26 ��Դ��δ֪
һ����ƽ�_APP�_�l
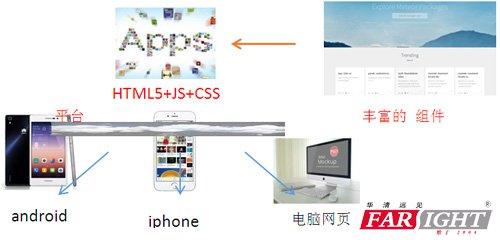
Ŀǰ����html5+javascript+css �_�l��ƽ�_�������ɞ�һ�����c��html5�_�l�W퓵ĹǼܣ�CSS�_�l�W�Ƥ�w��JS���ھW퓻��ӡ����H��S�oһ�״��a��ͨ�^��ͬ���g��ʽ���m��PC�ˣ�ios�ƄӶ�,android�ƄӶˡ� �ڿ�ƽ�_����У�meteor �Կ����_�l���Q��
���� Meteor ����֮̎
1. �O�٘���
a. �חl������Ʉ���
b. ���ն˿͑���һ�w(����ͨӍ���F)
c. ����������
2.Plugin��� �S��
3.���ݵ�����(��react)
4.�ٷ��ęn����
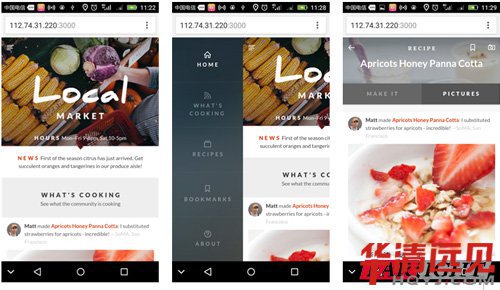
����Meteor App Ч����ʾ
meteor�پW����app Ч����ʾ��������Ľ؈D��������
�ģ���meteor ���ٌ��F App
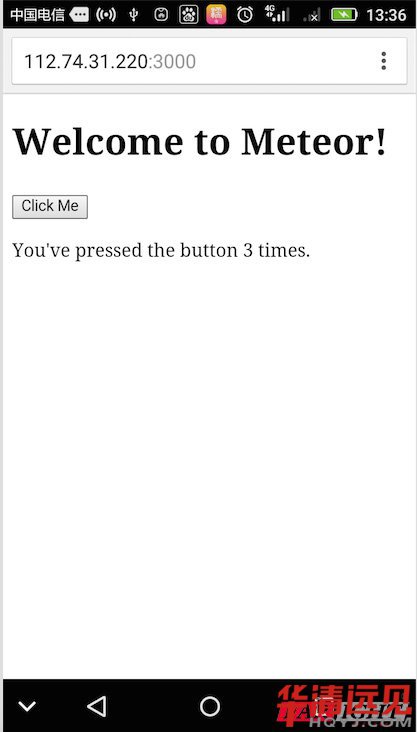
1. ����
#curl https://install.meteor.com | /bin/sh ���bmeteor
#meteor create a1_hello
#cd a1_hello
#meteor �\��
����a1_hello.html ���� �W퓕�ͬ��׃��
�g�[���L��//localhost:3000��������
//----Դ�aa1_hello.html ���F������@ʾ
<head>
<title>a1_hello</title>
</head>
<body>
<h1>Welcome to Meteor!</h1>
{{> hello}} //�{��ģ��hello
</body>
<template name="hello"> //���xģ��hello (ģ�K������@ʾ��
<button>Click Me</button>
<p>Youve pressed the button {{counter}} times.</p> //{{counter} �{��ģ��hello��Č���counter
</template>
//----Դ�aa1_hello.js ���F����Ļ���
if (Meteor.isClient) { //�z�y�Ƿ��ǿ͑��ˣ��DŽtʹ������Ĵ��a�\��
// counter starts at 0
Session.setDefault('counter', 0); //�O��counter���Iֵ��0 --- Session ����̎�� �Iֵ��(key-value)
Template.hello.helpers({ // ���Fģ��hello�� helpers����
counter: function () { // �ь���counter�ͺ���function �P���� (�ӿ�+���F)
return Session.get('counter'); //����counter���Iֵ
}
});
Template.hello.events({ // ���Fģ��hello���¼� click button
'click button': function () { //click button ���¼���function���¼��|�l�ĺ��� (�ӿ�+���F)
// increment the counter when button is clicked
Session.set('counter', Session.get('counter') + 1); //ʹcounterֵ��һ
}
});
}
if (Meteor.isServer) { //�z�y�Ƿ��Ƿ��նˣ��DŽtʹ������Ĵ��a�\��
Meteor.startup(function () {
// code to run on server at startup
});
}
2. �б��@ʾ
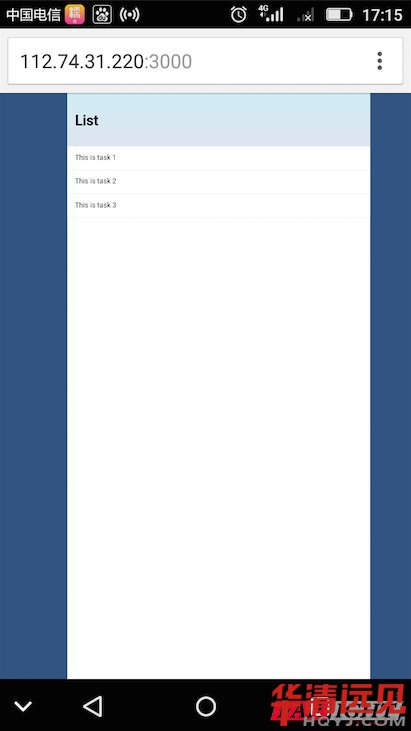
//----Դ�aa1_hello.html ���� �б��@ʾ
<head>
<title>list</title>
</head>
<body>
<p class="container">
<h1> List </h1>
{{> task}}
</p>
</body>
<template name="task">
<ul>
<li> list 1</li>
<li> list 2</li>
<li> list 3</li>
</ul>
</template>
//----Դ�a a1_hello.css �O�� �@ʾЧ��
body { //�O�� html���Ԏ���body�˺������ �@ʾ����
font-family: sans-serif;
background-color: #315481;
background-image: linear-gradient(to bottom, #315481, #918e82 100%);
background-attachment: fixed;
position: absolute;
top: 0;
bottom: 0;
left: 0;
right: 0;
padding: 0;
margin: 0;
font-size: 14px;
}
.container { //�O���Խ��������container�Č���� �@ʾ����
max-width: 600px;
margin: 0 auto;
min-height: 100%;
background: white;
}
header { //�O��header����� �@ʾ����
background: #d2edf4;
background-image: linear-gradient(to bottom, #d0edf5, #e1e5f0 100%);
padding: 20px 15px 15px 15px;
position: relative;
}
ul { //�O��ul�б팦��� �@ʾ����
margin: 0;
padding: 0;
background: white;
}
li { //�O��li�б�헌���� �@ʾ����
position: relative;
list-style: none;
padding: 15px;
border-bottom: #eee solid 1px;
}
3. �h�̔�����惦
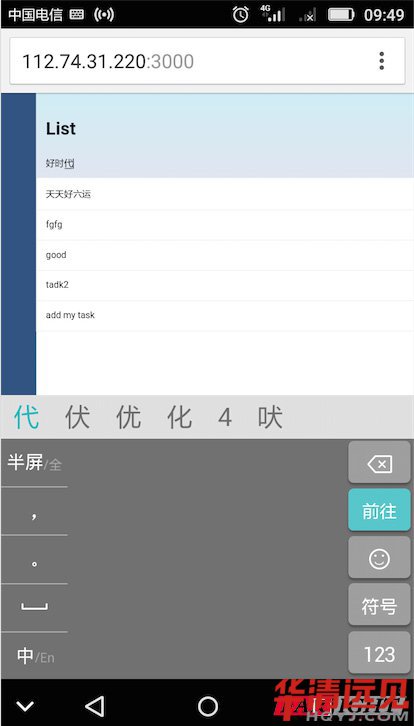
//----Դ�aa1_hello.html ʹ�ñ��ݔ�뷽ʽ�������б�����@ʾ
<head>
<title>list</title>
</head>
<body>
<p class="container">
<header>
<h1> List </h1>
<form class="new-task"> ���� ��ε�ݔ���
<input type="text" name="text" placeholder="Type to add new tasks" /> ݔ������ɫ����ʾ��Ϣ
</form>
</header>
<ul>
{{#each tasks}}
{{> task}}
{{/each}}
</ul>
</p>
</body>
<template name="task">
<li> {{text}}</li>
</template>
//----Դ�aa1_hello.js ���ݔ����ܲ��딵������(MongoDB Collection)
Tasks = new Mongo.Collection("tasks"); //�����������B��(MongoDB collection) “tasks" ���ڴ惦�б����
if (Meteor.isClient) {
// This code only runs on the client
Template.body.helpers({
tasks: function () {
return Tasks.find({},{sort: {createdAt: -1}}); //���Ҕ�����MongoDB���ݲ����� ԔҊAPI�ęn //docs.meteor.com/#/basic/Mongo-Collection-find
}
});
Template.body.events({
"submit .new-task": function (event) { //���F����new-task��submit�¼����|�l����
// Prevent default browser form submit
event.preventDefault();
// Get value from form element
var text = event.target.text.value;
// Insert a task into the collection
Tasks.insert({
text: text,
createdAt: new Date() // current time
});
// Clear form
event.target.text.value = "";
}
});
}
if (Meteor.isServer) {
Meteor.startup(function () {
// code to run on server at startup
});
}
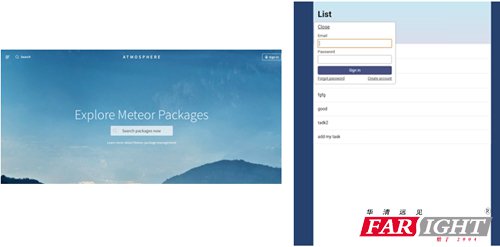
�壺�S���M��
�����M�� https://atmospherejs.com
ʹ��account�M��
Ÿ#meteor add accounts-ui
#meteor add accounts-password
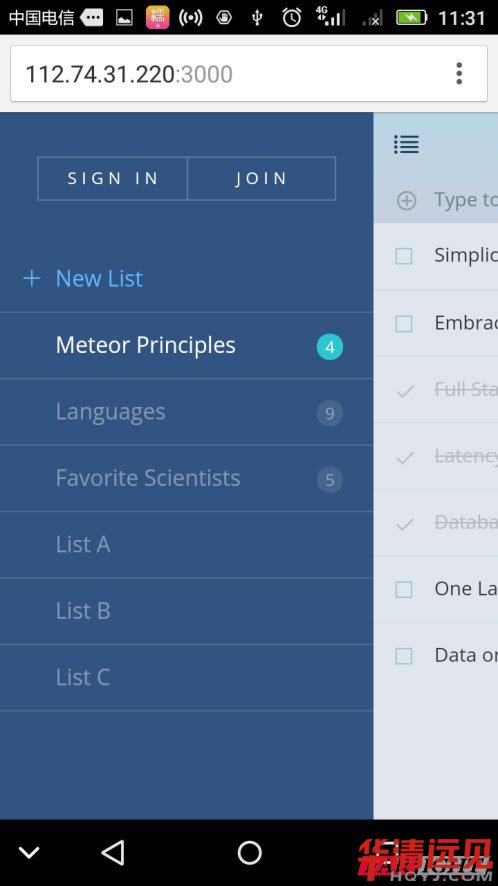
�����_Դ�Ę���
#meteor create --example todos
#cd todos
#meteor
�g�[���L��//localhost:3000������
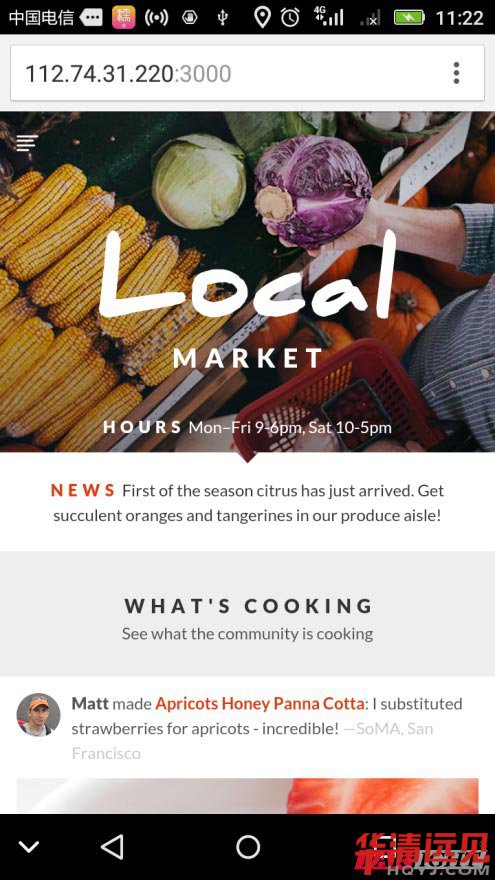
#meteor create --example localmarket
#cd localmarket
#meteor
�g�[���L��//localhost:3000������